Showing posts with label MAKE. Show all posts

3.06.2013

TUTORIAL- Sew your own knotted newborn sleeper...


I have been drooling over these knotted sleeper's from Mod Swad, only I don't know if I will ever feel okay about spending $35 dollars on any onesie -ever. So I came up with a little tutorial on how to sew your own knotted baby sleep sack. I think they would make the perfect baby shower gift. All you need is an old (or new) Jersey stretch T-shirt, a 16 inch zipper, and one button. 


  • Start by laying a full body baby suit- of whatever size you want down on top of your shirt. Use the neck of the shirt, so that you do not have to sew your own.
  • Trim along the sides of the body-suit.. {you will want to tuck the arms in and cross the legs so that they don't get too big, this sleeper is meant to be REALLY snug to the baby's body.}
  • Use your first cut edge as a guideline on where to cut the other side (fold in half, then cut)
  • Use your zipper to measure how far into the front piece to cut your zipper opening. {cut it right down the center of the FRONT only.
  • End with pinning your neck in so that it is small enough for the baby. {i just made simple darts}
  • You will also need an extra scrap of fabric cut 4 inch by 1.25 inch - this will become the button strap that covers the top of the zipper.

1. Sew the long side of your button strap, as well as one short side,
2. Turn it inside-out then topstich the three edges that are closed,
3. Add a button hole on short sewn edge.

4. Sandwich the button hole piece (with the raw edge side) between the right side of the zipper and the right side of the zipper opening --baste to keep it all together.
5. Check your basting stitches to be sure you got the zipper sewn on the right side of the fabric.
6. Sew your button onto the other side of the zipper opening.

7. Sew the zipper down on each side, backstich once you get to about .5 inch to the end of your zipper.
8. Sew under the zipper to close off the bottom of the zipper opening.
9. Topstich down the entire zipper, to keep the fabric from getting caught in the zipper. -no photo-
10. Sew the neck smaller, and make sure the shoulders lay right, this took me two or three times before it looked just right.
11. Sew down both sides, of the sleeper, and backstich once you get about 1.5 inches below the zipper line. -no photo-
12. Trim all excess fabric and threads.

Sorry, It was kind of hard to see the stitches I was making with the black on black. please leave a comment with any ququestions you come up with along the way! Happy Sewing!
 

11.05.2012

a very handmade holiday


...its happening again. I have my holiday slippers on, I'm sporting my oversized snugly knit sweater, I have been sipping hot chai and YES I am listening to the Mindy Smith Holiday mix on Pandora. I am SOO happy to be heading into the happiest time of the year! I have rounded up a few of my favorite tutorials for your holiday crafting needs. This year I am trying to stick to 100% hand made (except for whatever insanity I come up with for hazel)

10.29.2012

Last Minute Halloween Crafts


Happy (almost) Halloween!  What are you all doing to celebrate?  We carved pumpkins and ate delicious donuts this weekend.  Please excuse little A's silly face.  He is telling me all about how gross his pumpkin "brains" are. 

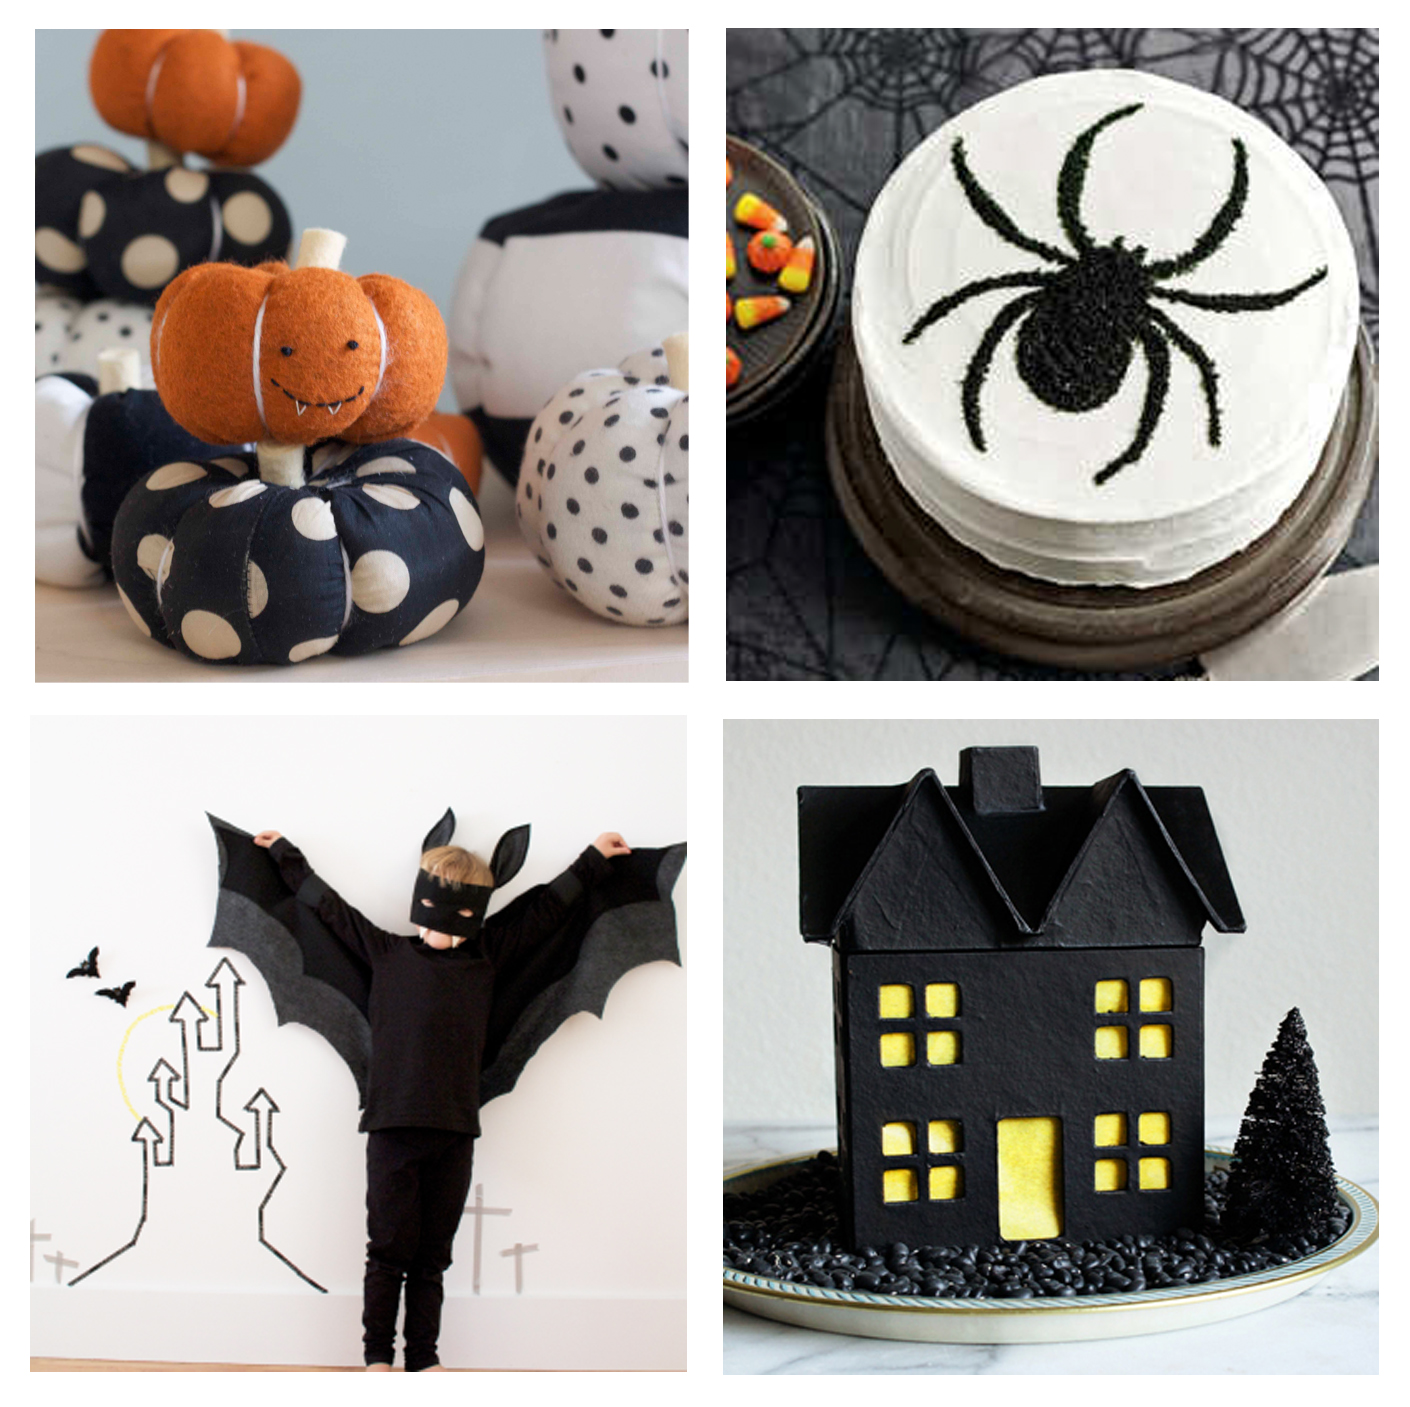
Here are a few last minute craft ideas to get you in the Halloween mood:

I want to make one of these stuffed fabric pumpkins (tutorial by the amazing Alison).
This awesome spider cake would put any Halloween party over the top!
Meta has some adorable ideas for last minute costumes.
It would be so fun to write all over this chalkboard haunted house!

10.24.2012

Halloween Skull Garland and Skeleton Costume


I made this crocheted skull garland to decorate for the skeleton-themed birthday party we had at our house last week.  Lucky for us, it also does triple duty as a Day of the Dead and Halloween garland.  Isn't it fun?  It wasn't too difficult, and only took a few evenings to complete - you still have some time to finish yours before Halloween!!  I found the pattern here and attached them together using these basic guidelines.


Here's a quick peek at one of the freezer paper skeleton costumes I made for the boys.  They wore them for their birthday party last week and loved being spooky.  Only A felt like getting his picture taken, but I promise there's another skeleton lurking just outside the frame.  


p.s.  Our fall challenge went oooookaaaaay.  Was that convincing?  It turns out that TV watching is a hard habit to break.  We did decrease our viewing time, but couldn't quite quit.  We're human.  Did anyone else try?  Tell us all about it!

10.17.2012

KCWC Simple Dress Free Pattern

    Thank you for such amazing response to the simple dress that I made for the Kid Clothes Week Challenge last week. I have drafted my first pattern! I hope that it makes sense. Please feel free to leave comments with questions/ suggestions on any issues!


It is about the size {18 mo. - 2 yr}

Download the pattern here!

10.14.2012

Kid Clothes Week Challenge DAY SEVEN!

 We have come to the end of the first Kid Clothes Week Challenge for Wandering Little Braves. Next time around I will be doing a mix of boy and girl Items. I will also Include pattern downloads with each project. I wasn't sure how things would go, and I am so happy that we had so much support from all of you! Thank you for all your comments! Keep them coming. 

This pinafore is another of my own designs, I love the open back! I want to try one in an adult size next.


10.13.2012

Kid Clothes Week Challenge DAY SIX!


This little fox scalloped skirt was pretty simple to sew, Just three panels, and a chunky elastic waste-band. The fabric is MODA, from Aneela Hoey's walk in the woods line {more specifically- Foxlets, and the Mushrooms on Cloud.}


10.12.2012

Kid Clothes Week Challenge DAY THREE and FOUR and FIVE!


This shirt was a doozy. The pattern was simple enough to sew, however the crochet edging took longer than expected. Anyhow- it turned out to be delightful, and so worth all the work.

10.09.2012

Kid Clothes Week Challenge DAY TWO!


I will be the first to admit, this is one of those "Don't look too closely" projects. I refashioned this Shirt out of an old, stained t-shirt. I loved the stripes, but wanted to add little somethin'-somethin' I pulled out the old fabric paints, and Voila! Here you have it, Hazel's Fancy Cat Shirt.


10.08.2012

Kid Clothes Week Challenge DAY ONE!


This week I am joining the Kids Clothing Week Challenge! Today I am kicking it off with this little dress I made out of an old set of sheets. This week I am going to be trying to use recycled fabric as much as I can. {I did splurge of a few new fabrics as well!} Anyway this dress was seriously easy to make, get the pattern here!


9.05.2012

Easy DIY Bookshelf Makeover

 This was such a fun, cheap, easy way to make our space a little more fun. I visited a local wallpaper shop, where they sell left over rolls of wallpaper for $5!! So, needless to say, my mind has been reeling with possibility. I finally decided on adding the wallpaper the back of a hand-me-down bookshelf. The process was simple, once I had the wallpaper that I wanted;

1.   I choose a matching paint color (we went with black chalkboard- something a little funner to keep the 2 year old busy)
2.    I painted the shelf- we did about 2.5 coats (I used a mini-roller for a smoother finish, spraypaint also does the trick -find spray-painting tips here.
3.    I cut out wallpaper pieces (TRY TO BE VERY EXACT) -Using a measuring tape and a straight-edge for your cuts saves you lots of time and mess.
4.    Then once the paint is fully dry, I applyed a layer of glue to the back of the shelves, then press your wallpaper to the glue as carefully as you can. (Use wallpaper glue from home depot) It is helpful to have a wet rag to clean any excess glue.
5.    Then lay books on top of the wallpaper for a few hours so that it drys without too many bubbles. 

-and voila, you have a new bookshelf! It's amazing how such a small piece of furniture can make a space feel nice and new! It brings a smile to my face every time I come into Hazel's room.