

Showing posts with label sewing. Show all posts
Showing posts with label sewing. Show all posts
1.30.2014
Kid Clothes Week Day 3 + 4
Day Three and Four came by in a FLASH! I have been feverishly sewing my baby moccasins. They are seriously the most comfortable baby shoe that never falls off. They are stylish and very soft on the babes foot as they learn to crawl and walk. They also keep socks in place. They are cotton on the top, and leather on the bottom. Elastic in the back keeps them held snug to your baby's foot. They are seriously the perfect baby shower gift.

1.28.2014
Kids Clothes Week Day 1
We are back- and instead of making excuses I am just going to jump right back into things. Were going along with Elsie Marley's genius Kid Clothes Week Challenge to sew one hour each day this week of kids clothes. Yesterday was the kick-off and we went with a recycled T-shirt sewn into drawstring baby pants.
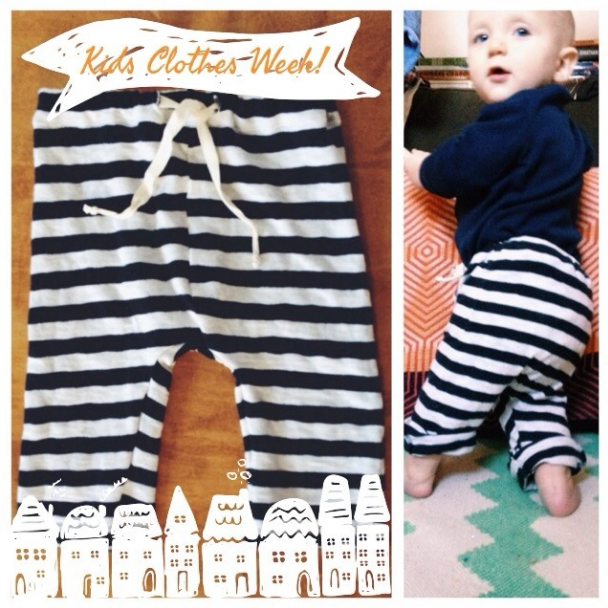
I might make a little tutorial if anyone is interested.
Its good to be back.
Also please check out my new Etsy site!!
3.08.2013

3.06.2013
TUTORIAL- Sew your own knotted newborn sleeper...


I have been drooling over these knotted sleeper's from Mod Swad, only I don't know if I will ever feel okay about spending $35 dollars on any onesie -ever. So I came up
with a little tutorial on how to sew your own knotted baby sleep sack. I think they would make the perfect baby shower gift. All you need is an old (or new) Jersey stretch T-shirt, a 16 inch zipper, and one button.

- Start by laying a full body baby suit- of whatever size you want down on top of your shirt. Use the neck of the shirt, so that you do not have to sew your own.
- Trim along the sides of the body-suit.. {you will want to tuck the arms in and cross the legs so that they don't get too big, this sleeper is meant to be REALLY snug to the baby's body.}
- Use your first cut edge as a guideline on where to cut the other side (fold in half, then cut)
- Use your zipper to measure how far into the front piece to cut your zipper opening. {cut it right down the center of the FRONT only.
- End with pinning your neck in so that it is small enough for the baby. {i just made simple darts}
- You will also need an extra scrap of fabric cut 4 inch by 1.25 inch - this will become the button strap that covers the top of the zipper.

1. Sew the long side of your button strap, as well as one short side,
2. Turn it inside-out then topstich the three edges that are closed,
3. Add a button hole on short sewn edge.
2. Turn it inside-out then topstich the three edges that are closed,
3. Add a button hole on short sewn edge.

4. Sandwich the button hole piece (with the raw edge side) between the right side of the zipper and the right side of the zipper opening --baste to keep it all together.
5. Check your basting stitches to be sure you got the zipper sewn on the right side of the fabric.
6. Sew your button onto the other side of the zipper opening.
5. Check your basting stitches to be sure you got the zipper sewn on the right side of the fabric.
6. Sew your button onto the other side of the zipper opening.

 7. Sew the zipper down on each side, backstich once you get to about .5 inch to the end of your zipper.
8. Sew under the zipper to close off the bottom of the zipper opening.
9. Topstich down the entire zipper, to keep the fabric from getting caught in the zipper. -no photo-
10. Sew the neck smaller, and make sure the shoulders lay right, this took me two or three times before it looked just right.
11. Sew down both sides, of the sleeper, and backstich once you get about 1.5 inches below the zipper line. -no photo-
12. Trim all excess fabric and threads.
Sorry, It was kind of hard to see the stitches I was making with the black on black. please leave a comment with any ququestions you come up with along the way! Happy Sewing!
11.14.2012
Harmony Provo

When I first heard that a new yarn/fabric/gift shop was opening up in my neighborhood, I actually shrieked with joy. Tim can attest to that fact. Harmony was no disappointment! I am so excited to have all those crafty supplies and beautiful gifts within walking distance. And when I say walking distance, I mean really short walking distance. Like, I've been almost once a week since they opened because it is such a short walk and I am so bad at controlling my impulses. Had a rough day at school? I think I need more chunky yarn. Kids being crazy? Let's go for a walk that happens to go right by Harmony.
So, yeah. Harmony is chock full of an amazing variety of fabrics, gorgeous yarns, and cute trimmings and gifts from Darlybird. The ladies at Harmony also offer a wide range of classes to get you started, from beginning knitting to cooking classes. If you like the sound of any of those things and live around here, you should stop by. You could even pick up some supplies for your own handmade holiday. Knitters and crocheters (is that a word?) should come by this Thursday night at 7 pm for Harmony's bimonthly knit night.
See you there!
10.19.2012

10.17.2012
KCWC Simple Dress Free Pattern
Thank you for such amazing response to the simple dress that I made for the Kid Clothes Week Challenge last week. I have drafted my first pattern! I hope that it makes sense. Please feel free to leave comments with questions/ suggestions on any issues!

It is about the size {18 mo. - 2 yr}

Download the pattern here!
Subscribe to:
Posts (Atom)