Suddenly I've realized that somewhere along the line of having kids and becoming a mom, some of myself just kind of slipped away. I was a target shopping for baby food when I caught a glimpse of myself in the mirror. WTF?! I was wearing house slippers, polka-dot mom blue-jeans, with a horribly fitting polka-dot blue button up. Luckily I had my baby carrier over the majority of the top. For me, this was rock bottom. I went home and filled a huge box of ill-fitting clothes, and striped-everything and drove it directly to our local thrift store. When did I settle on looking mediocre instead of the way that I want to look?! When did I start shopping primarily at the old-navy clearance rack?! Out with the old!
Its not only about appearances, I feel like I am not really sure who I am anymore as well. A few weeks ago I found myself with a bit of kid free time to kill, and seriously, I couldn't even remember what I like to do. Do I still enjoy sitting in a cafe and reading alone, Or would I like to go to a bookstore and treat myself to a new magazine? I kept answering myself 'no don't get a magazine when will you ever find time to look at it?' etc. I am my own worst enemy, and I am now on a path of self-discovery.
I bought myself this journal and I am jumping in with both feet. Care to join?!
2.25.2014
1.30.2014
Kid Clothes Week Day 3 + 4
Day Three and Four came by in a FLASH! I have been feverishly sewing my baby moccasins. They are seriously the most comfortable baby shoe that never falls off. They are stylish and very soft on the babes foot as they learn to crawl and walk. They also keep socks in place. They are cotton on the top, and leather on the bottom. Elastic in the back keeps them held snug to your baby's foot. They are seriously the perfect baby shower gift.


1.28.2014
Kids Clothes Week Day 1
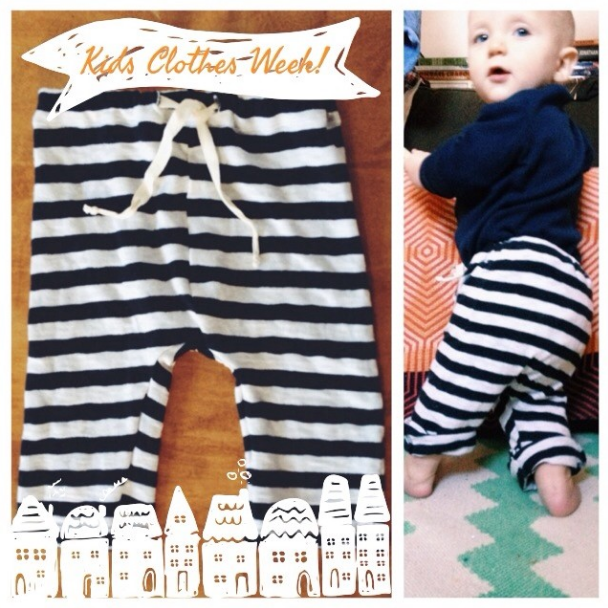
We are back- and instead of making excuses I am just going to jump right back into things. Were going along with Elsie Marley's genius Kid Clothes Week Challenge to sew one hour each day this week of kids clothes. Yesterday was the kick-off and we went with a recycled T-shirt sewn into drawstring baby pants.
I might make a little tutorial if anyone is interested.
Its good to be back.
Also please check out my new Etsy site!!
3.11.2013
New babe's name...
And the boy's name is going to be; Moon. Mainly because we adore the name Moon, we love all that it encompasses - specifically the unique tie that it has on each of us as individuals. Originally we came up with idea of using Moon for our second child's name on my birthday. We were out to dinner talking about the fact that there are really only 2 or 3 boy names that we would even consider, when my husband {Trevor} suggested that we think more outside the box. We started talking about our favorite things in life which led us right to, nature. We quickly agreed that we wanted to use a name that held some tie to nature and the outdoors. We went through a list of different tree's, forests, rocks, and elements -then Trevor suggested, Moon. I immediately got a feeling that >this was it< and why not?!
We tried so hard to pick something original with Hazel (our first) and at first we had settled on Scout. Both of us regretted switching from Scout Hazel to Hazel Scout at the hospital. The name Hazel, suits her so well and it will always be her name, I just felt so much pressure from different members of our family- and in the moment at the hospital, as family was flooding in just moments after her arrival, I just kind of caved and went with name that was much more accepted within our family, Hazel. This time around I do not want to have any regrets, I know so much more about how this will all pan out, and so I am going for it. Moon Huish. We will call him Moony- and yes that is in direct reference to J.K. Rowling's character in the Harry Potter books, Remus Lupin.
We realize that it is not a traditional name, and he may take some heat later in life, but luckily we will be able to face that together as a family. We love every aspect of the moon, and we think that it fits right into this crazy bohemian family lifestyle that we are trying to create for ourselves and our children. 'Moon' was one of Hazel's first words, and since she was able to string words together, she whispers to us at night, "I love you to the moon, and the stars, and the shiny moon stars." We are all ecstatic for this new baby, and can not wait to welcome our own Moon into this world.
3.08.2013
3.06.2013
TUTORIAL- Sew your own knotted newborn sleeper...
I have been drooling over these knotted sleeper's from Mod Swad, only I don't know if I will ever feel okay about spending $35 dollars on any onesie -ever. So I came up
with a little tutorial on how to sew your own knotted baby sleep sack. I think they would make the perfect baby shower gift. All you need is an old (or new) Jersey stretch T-shirt, a 16 inch zipper, and one button.
- Start by laying a full body baby suit- of whatever size you want down on top of your shirt. Use the neck of the shirt, so that you do not have to sew your own.
- Trim along the sides of the body-suit.. {you will want to tuck the arms in and cross the legs so that they don't get too big, this sleeper is meant to be REALLY snug to the baby's body.}
- Use your first cut edge as a guideline on where to cut the other side (fold in half, then cut)
- Use your zipper to measure how far into the front piece to cut your zipper opening. {cut it right down the center of the FRONT only.
- End with pinning your neck in so that it is small enough for the baby. {i just made simple darts}
- You will also need an extra scrap of fabric cut 4 inch by 1.25 inch - this will become the button strap that covers the top of the zipper.
1. Sew the long side of your button strap, as well as one short side,
2. Turn it inside-out then topstich the three edges that are closed,
3. Add a button hole on short sewn edge.
2. Turn it inside-out then topstich the three edges that are closed,
3. Add a button hole on short sewn edge.
4. Sandwich the button hole piece (with the raw edge side) between the right side of the zipper and the right side of the zipper opening --baste to keep it all together.
5. Check your basting stitches to be sure you got the zipper sewn on the right side of the fabric.
6. Sew your button onto the other side of the zipper opening.
5. Check your basting stitches to be sure you got the zipper sewn on the right side of the fabric.
6. Sew your button onto the other side of the zipper opening.
 7. Sew the zipper down on each side, backstich once you get to about .5 inch to the end of your zipper.
8. Sew under the zipper to close off the bottom of the zipper opening.
9. Topstich down the entire zipper, to keep the fabric from getting caught in the zipper. -no photo-
10. Sew the neck smaller, and make sure the shoulders lay right, this took me two or three times before it looked just right.
11. Sew down both sides, of the sleeper, and backstich once you get about 1.5 inches below the zipper line. -no photo-
12. Trim all excess fabric and threads.
Sorry, It was kind of hard to see the stitches I was making with the black on black. please leave a comment with any ququestions you come up with along the way! Happy Sewing!
3.04.2013
Nesting, or something like it.
This is going to be the new guys blessing gown:
 |
Baby Kimono with Raglan Shaping |
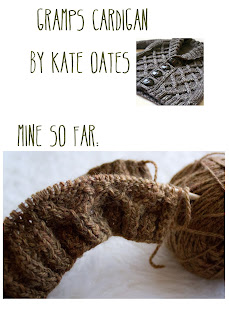
Since I found out I am having a boy-child, My fingers have been feverishly knitting. I have started 12 different projects, and so far finished.. 3?! I am going to start a weekly update here -in the hopes that telling someone about my projects will make me actually complete
 |
Cool Kids´Capris |
 |
Pointed Pixie hat |
 |
| Find more here. |
 |
| Find more here. |
 |
| Find more here. |
 |
| Find more here. |
 |
| Find more here. |
 |
| Find more here. |
 |
| Find more here. |
 |
Knitted Baby HatPattern by Fiona Duthie |
 |
| Find more here. |
Subscribe to:
Posts (Atom)


